This section covers how to add a training Resource and explains how Resources and Courses are tied together.
*A Resource can exist on it’s own and a Courses can exist on it’s own. The reason to know this is that a Resource MUST exist before it can be tied to a Course and a Course MUST exist before it can be tied to a Resource. At some point, one of these must exist before the other. If there is an existing Course for which a second Resource has been sourced, then choosing to Add a Resource will immediately allow the option to add the existing Course to the new Resource.
Open Resources from the Employee List / Home Page.
The Resource List will open showing a blue header with options for filtering Resource information.
Above the Blue header is a black ribbon which offers the options to Add Resource or Return.
By default, the full list of Active training Resource Companies will be listed below the header.
Add a Resource
Click the Add resource on the top left of the black ribbon above the blue header. The Add Resource form will open. The record will be saved when the Return button is clicked. This may be done before any contacts or Courses have been assigned to the new Resource. Return to the Employee List and navigate back to Resources to find the new Resource available as a choice on the Resource list.
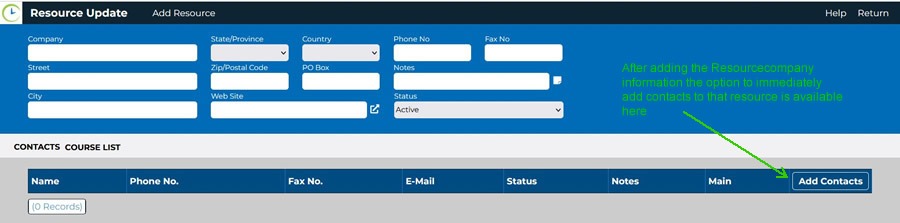
When entering the Resource supplier’s information the opportunity to enter contact information for this Resource supplier is immediately available at this time however, it is not required immediately.
Hit add contact below and to the left of the new contact in order to save. A confirmation message will appear and a nameless copy will be generated if you need to add a second contact for this resource. The efficiency in this is that e-mail addresses for contacts from the same company usually have the same @information.com suffix and many times the Phone number will be the same.
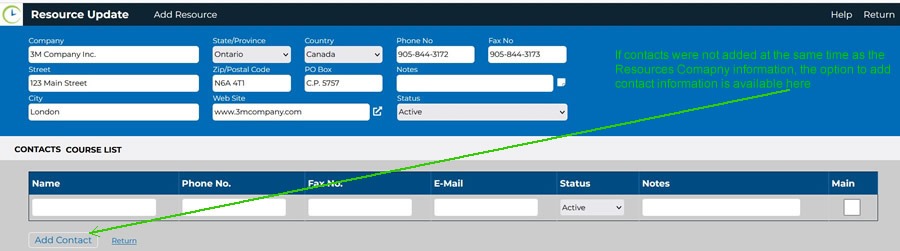
To add contact information at a future date, choose the Resources button from the Home Page header and navigate to the Resource Update form. Filter to find the Resource to which contact information is to be added and choose Add Contact from the bottom ribbon.

If possible, add a note regarding the contact for other users of the application. It may save time in the future to know this contact / trainer was excellent or specialized in something.
If you hit the return button below the new contact, the information will not be saved.
It is also possible, from this screen to open the Course List (shown beside the Contacts option) on the bottom white ribbon. This will actually show a list of all Courses available in the system. If the Course has been previously added, it will be available to choose at this time., however, if it has not, the Course must added using the Courses button from the Home Screen / Employees list and added there.