This section covers how to add a Course Session to the session list. Adding Course sessions makes them available to be assigned to student employees.
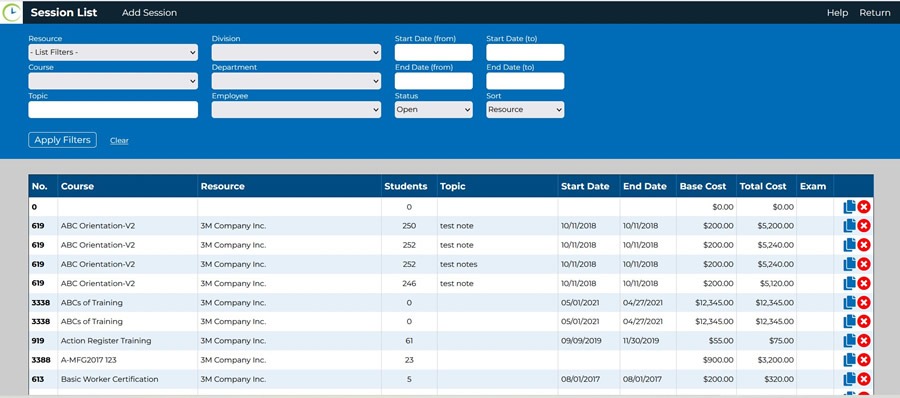
From the Home Screen / Employee List click on Sessions to open the Session List. All training Resource companies are listed below the header of this screen by default. To choose a Resource for whom you would like to add Session information, use the blue header area to narrow the search parameters.
Choose Add Session from the top black ribbon to open the Session Update form. If there are Courses and Instructors currently assigned to the Resource chosen, they will be available as drop down menu items in the blue form header.
Sessions may also be copied for convenience sake. From the Session List choose the Session to be copied and click on the blue Folded Page Corner icon at the far right column. This will open a copy of that Session. The Resource and Course information will be shown. All other Session information will need to entered and the default dates replaced with new dates.

To add completely new session, use the Session Update form which will open when the Add Session option is chosen from the Session List.
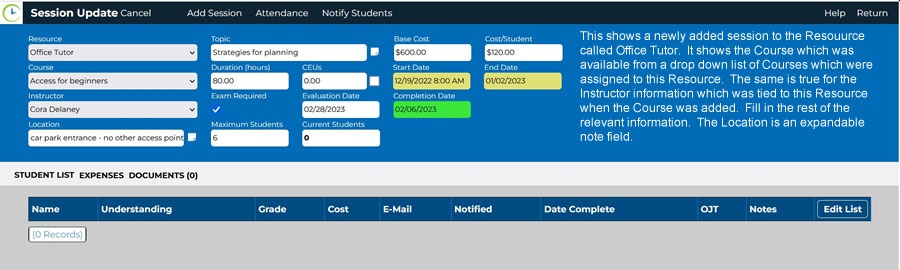
A Session cannot be added if the Course information is not entered. If a new Session information set is opened, and the Course information is not entered, an error message will be generated when the return button is clicked, letting the user know that the information will not be saved.
To add Employee students to the Session assignment list choose the Edit List option in the small blue header of the Student List shown under the Session Update form. Students may be chosen from multiple Divisions and Departments to make up a required attendance list.
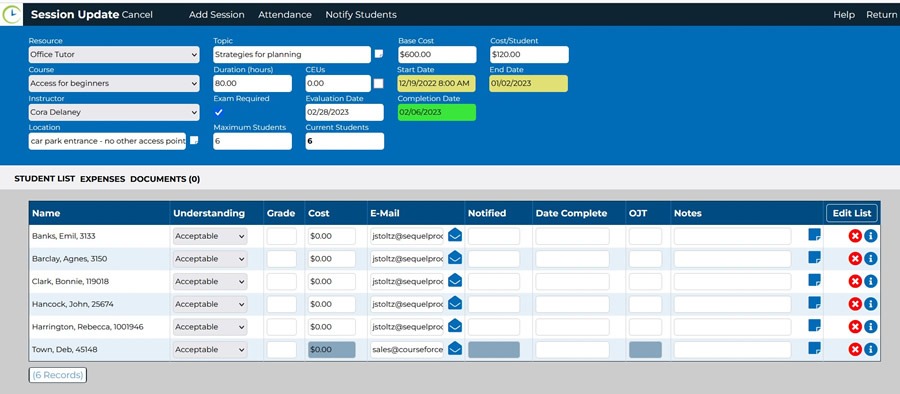
The Student List is the default option shown under the Session Update form. Other options available are Expenses and Documents. Both are self-explanatory. Documents such as travel receipts and Certificate may be upload to the the application. They will be tied to the student Employee and to the Session. Session information for student Employees may be set to automatically e-mail information about the Session to assigned students. An attendance sheet may be obtained from the Sessions update by clicking the Attendance option from the top black ribbon of the Session Update header.